Today the hubby and I had our pictures taken. We've been together 5 years, married for 6 months, and we have not had any professional pictures taken. Ever. In his words, "I thought the roller coaster pictures from Sea World were a nice touch." This is what I am working with ladies and gentlemen. There is never a dull moment in our home.
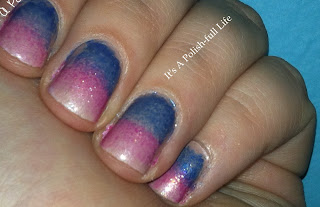
I've been dying to try a gradient nail after seeing tons of tutorials and I thought today's photo shoot was the perfect occasion. The dress I found for today's pictures has a fuchsia, blue, white and black pattern that swirls together. I wanted to incorporate those same colors for my nail art. I've never done gradient nails before, so I was not sure how the end result would look. Here is what I got.
I like how it came out. Next time I try this technique out I will use more contrasting colors. It would be fun, possibly bold. Today, however, did not call for a bold look. I wanted soft, demure, and romantic.
I even took a picture of the colors I used so I could remember them. I decided to do my nails around 10:30 p.m. and once I took pictures and edited them, I was dead tired. Taking a bottle shot was the only way to remember all of the colors. So here they are in all their glory.
 | |||
| From left to right: A-England Order of the Garter, China Glaze Strawberry Fields, Zoya Cristina and Pandora |
I can't wait to see how my nails look in the pictures . The photographer took some nice shots of us holding hands and she spot lighted our wedding bands. I'll have to post those pictures when I get them.
Well that's it for tonight. Ta-ta!
Hugs and love,
Karen


No comments:
Post a Comment